Sunday, December 28, 2008
I have been able to work on a bunch of scrapbook layouts. I will try to get some pictures of them and post them really soon. I am hoping to get this blog really going now that Christmas is over and I have a little extra time. Check back soon.
Tuesday, December 9, 2008
I just found a place that is having a great sale. Here is their web site. I was able to go and get 100 sheets of scrapbook paper for $6 or less. It is great. Anyone who is in utah they are having their sale until the 20 of the month. They are located at around 467 North 1500 West in Orem. They have paper, embellishments, stickers, rub-ons, ribbon, books, etc for a GREAT price. I wish I had a lot more money and I would go back and get a LOT more. I was able to get some christmas gifts from them. I can't wait to get a couple of other things done so I can play and get caught up with my scrapbooking and card making.
Monday, December 8, 2008

Monday, December 1, 2008

Monday, November 24, 2008


Saturday, November 22, 2008
I just found a great place to buy stuff for scrapbooking. You can either look at their stuff for ideas or buy their packets to make scrapbook pages. It is awesome, and today is the last day of a GREAT sale. All scrapbook packets are 4.99-no limit. Now if you go on most saturdays you can get up to 4 packets on sale. Once I get some of the pages done I will post them. The other awesome thing is they have a picture and instructions with each packet, and you can use them to change up paper and redo layouts.
The place is For Every Scrapbook. It is located in Lindon on Geneva Road, for any who are in Utah.
Monday, November 10, 2008
Here are some countdown calendars for Christmas that I helped make. (Only one is totally done and pictured, I will add the other as they get finished)
Tuesday, November 4, 2008
I will be adding a couple of projects on here soon. I just need to get a few things then I can post. Sorry I don't do more. We are still adjusting to Aleana and I have not quite figured out how to accomplish ALL the things I want/need to plus take care of her needs. And with the other two always getting into things trying to "HELP".
Tuesday, October 14, 2008
I have not been doing a lot of crafting with just having Aleana. I will hopefully be working on some soon. But here is a really good recipe that I love.
Chocolate Trifle
1 (19.8 ounce) package brownie mix
1 (3.9 ounce) package instant chocolate pudding mix
1/2 cup water
1 (14 ounce) can sweetened condensed milk
1 (8 ounce) container frozen whipped topping, thawed
1 (12 ounce) container frozen whipped topping, thawed
1 (1.5 ounce) bar chocolate candy
1. Prepare brownie mix according to package directions and cool completely. Cut into 1 inch squares.
2. In a large bowl, combine pudding mix, water and sweetened condensed milk. Mix until smooth, then fold in 8 ounces whipped topping until no streaks remain.
3. In a trifle bowl or glass serving dish, place half of the brownies, half of the pudding mixture and half of the 12 ounce container of whipped topping. Repeat layers. Shave chocolate onto top layer for garnish. Refrigerate 8 hours before serving.
Sunday, September 21, 2008
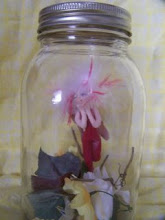
This last weekend we had a fabulous friday in our ward instead of a super saturday. I was able to make it and made this adorable advent calendar. They used the cricut to make a lot of it, but also some chipboard and wood pieces, you could also use a cuttlebug and other things as desired, you just have to improvise. In the circle at the top of the advent is supposed to be a 25, they just did not have it done, and we are supposed to get it soon. If not I will improvise.
If you want instructions I will post them, just leave a comment and I will try to do it soon. I was thinking of making a couple more anyway, and if I do, I will post how to make it and what stuff I use to make it. It just might be a while until I do that, depending on what happens here in the next while.
I also learned how to make these adorable flowers for accents with little girls. All you do is get the fabric flowers that you want with a jewel to put in the middle and hot glue them together. Then hot glue the clippy on the back and wala you are done and have these adorable flowers. I made a couple brown ones to go with Saedy's brown dress from the wedding. I can't get her to leave it in her hair, or I would get a picture and have her wear it more. But hey, maybe I can get the baby to wear more things like that. (Yeah right with my luck)


Sunday, September 14, 2008
Here is my first project post.
To make this card I used my cuttlebug. I used the Birthday Wishes combo Embossing and Die cut set. I decided just to use the candle from the die and the Make a Wish. 
The first thing I do is decide what colors I am going to use. Am I going to have the background a pattern of some sort or a solid color , is it going to be colored or white. Next I cut a 8 1/2 by 11 paper in half then scored that to make the fold easier.
I cut out the Candles then I cut out the Make a Wish
Here is the die I used
The candles once cut out
The Make a Wish
The I decide how I wanted it positioned on the paper. Using either double sided tape, something I prefer to use, or stick glue I put them on.
(Just a little side note. I usually have someone in particular in mind when making the card. That helps me to decide on exactly what I am doing, and I feel makes it a little more personal.)
Thursday, September 11, 2008
This is a blog just for my various crafts. I will post stuff about scrapbooking, cardmaking, cake decor/food fun, clay sculpting, and whatever else I feel like doing. I am hoping to put instructions, so later when I want to redo something I will be able to go back, or for others to use and play with.